Woocommerce Upload Files Then Show in Emails to Owner
WooCommerce Upload Files Allow Customers to Upload Images and Instructions for Customized Products
Does your WooCommerce store sell customized or personalized concrete or digital products? To complete custom orders, practise yous need boosted information from your customers?
Customer upload files for WooCommerce allows customers to upload image, document, sound, and video files in the post-obit formats.
- .DOC
- .DOCX
- .GIF
- .ICO
- .JPEG
- .JPG
- .MOV
- .MP3
- .MP4
- .PNG
- .SVG
- .WEBM
- .WMV
- .XLS
- .XLSX
Customers tin upload files on product pages and then add together them to their carts.
When customers upload files, they can likewise submit notes with additional details or explanations related to their orders.
Admins can set restrictions on file types, file notes, maximum file sizes in MB or KB, and brand uploading files a requirement.
Admins can set and add together fees to accuse for file uploads.
Benefits
Customer upload files for WooCommerce increases the quality of products with customization or personalization options. Having visual or written specifications from clients helps you create products that match client requests.
If the customer uploads something unclear, you can contact them for more than data or provide a mockup of the product before creating it.
With shared client images and instructions, y'all can increase client satisfaction and avoid returns.
Features
- Permit customers to upload a custom prototype, certificate, audio, and video files on product pages
- Option to let customers to upload notes to add instructions, questions, or clarifications
- Option to require file uploads with specific products
- Option to restrict file size or file type
- Option to charge a fee for file uploads
- Customers can add together the upload file fee to their carts when they purchase the production
- Option to add a popup tooltip on the product page for user information
- Options to display uploaded files in the cart and at checkout
- Options to customize button text, plugin text, labels
How to Install All in One Files Upload for WooCommerce
Installation
- Download the .Zilch file from your WooCommerce account
- Go to WordPress Admin > Plugins > Add New
- Click Upload Plugin at the top
- Choose the file and select the .Aught file you downloaded in step one
- Click Install Now and activate the extension
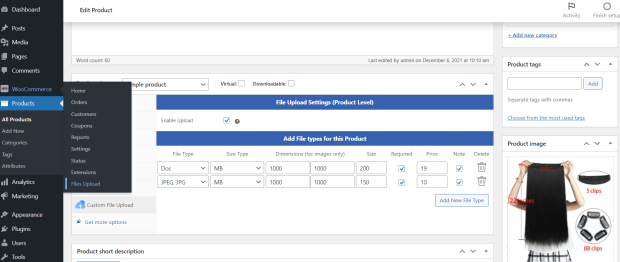
Set up your WooCommerce product with Addition
Become to Settings > Products > Upload Files Setting > Product Data then enable Product Level settings and create file upload settings.
Setting options
- Add file type
- Size type (KB or MB)
- Size
- Dimensions (for images)
- Determine if you require the upload file field
- Define the price of uploading files where applicable
- Enable or disable notes
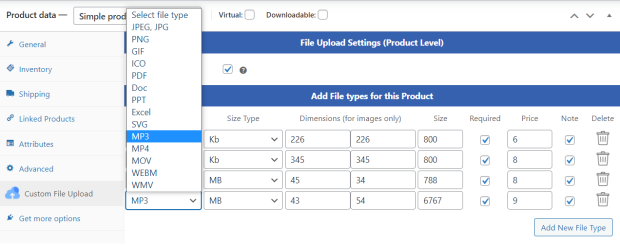
Yous can add as many file types as yous need by clicking the Add New File Type push.
If y'all add a file blazon in error or desire to remove 1 subsequently, you tin click the Delete (trash tin) icon and delete the row.
File types immune are: .DOC, .DOCX, .GIF, .ICO, .JPEG, .JPG, .MOV, .MP3, .MP4, .PDF, .PNG, .SVG, .WEBM, .WMV, .XLS, and .XLSX.
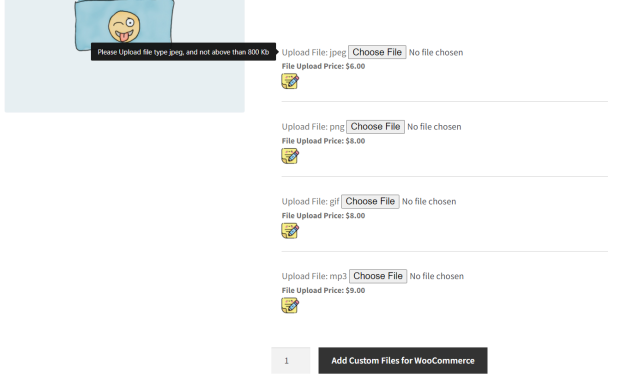
Front cease view of products
With settings defined, the front end view looks like the following screenshot. It shows users what file types they can upload with the production, maximum file size, cost to upload files where applicable and how to add a file notation. Fees for file uploads add to the cart as an additional purchase.
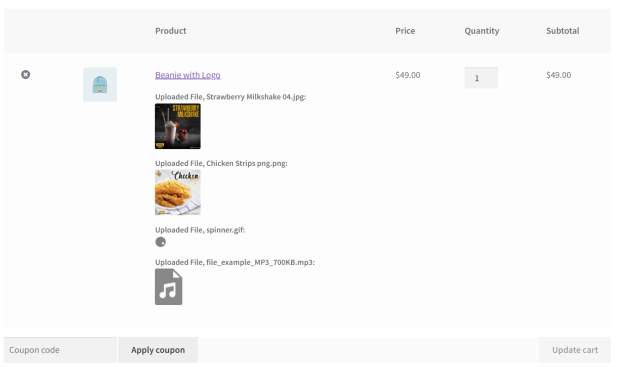
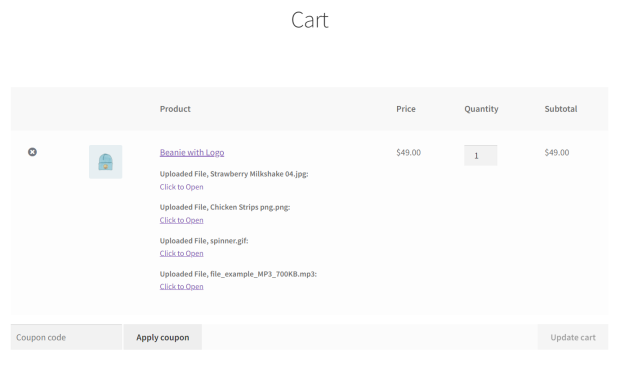
Cart page after added files
The admin tin can display the file name and graphic icon of the uploaded file or the file proper name and a Click Link push button to become to the file.
The post-obit screenshot shows the file name and graphic icon. It also shows the price of the file upload if a fee is charged.
Cart afterward added files and only links displayed
The following screenshot shows the file proper name and a Click Link push to go to the file. Information technology also shows the cost of the file upload if a fee is charged.
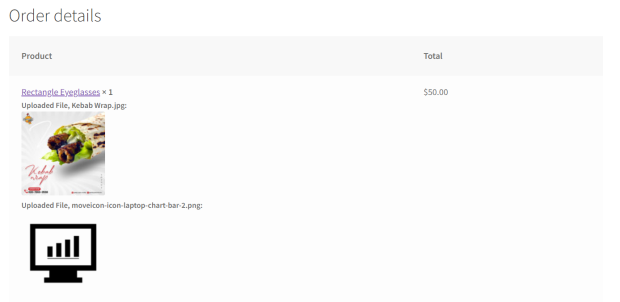
WooCommerce Thank you page
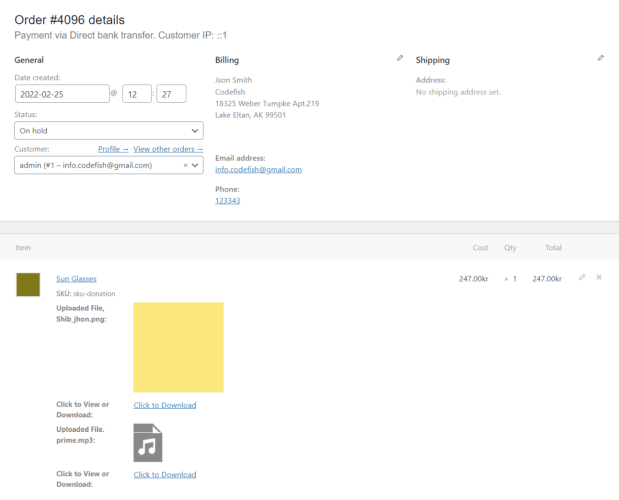
Order Back Office page
On the Order Back Office folio, admins tin see uploaded files and download them in one click to prepare custom orders.
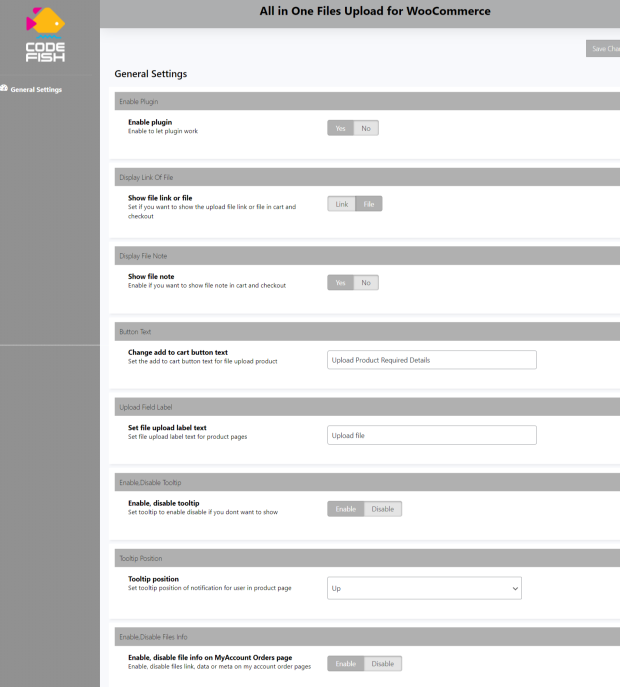
Setting options for All in I Files Upload for WooCommerce
In one case the plugin installs and is agile, go to Dashboard > WooCommerce > Upload Files Settings > Files Upload Addon for WooCommerce, and under General Settings, enable the plugin past selecting Yes next to Enable plugin working.
On the same dashboard you tin also choose to:
- Evidence file link or file
- Show file notation
- Change Add together to Cart button text
- Fix file upload label text
- Enable or disable tool tip
- Ready tool tip position
Translation
Client upload files for WooCommerce plugin includes a .POT language file to facilitate translations.
Source: https://woocommerce.com/products/all-in-one-files-upload-for-woocommerce/
Post a Comment for "Woocommerce Upload Files Then Show in Emails to Owner"